Archive

Archive for the ‘sewing tips’ Category

Important Sewing Tools

January 2nd, 2011


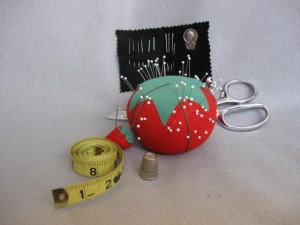
I like sewing gadgets. I keep them in boxes and drawers all over my sewing room. If I had to decide on the most important sewing tools without listing the sewing machine itself, I would say: dressmaker scissors, an assortment of pins and a pin cushion, an assortment of hand sewing needles, a thimble, and a tape measure.
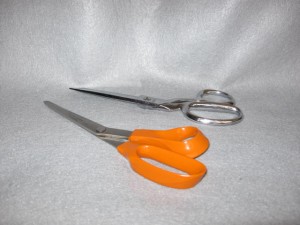
 

It is important that scissors are sharp and well made. I have both Gingher and Fiskars dressmaker shears. I can recommend either pair.
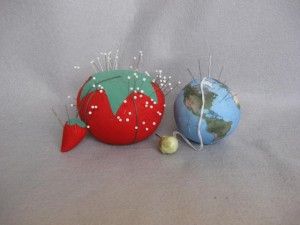
I usually use glass head silk pins, but sometimes I use silk pins with a smaller metal head. I have an over sized tomato pin cushion and now a globe pin cushion made from the free pattern  offered on this website. (see patterns)

I have an assortment of hand sewing needles. Different sewing jobs need different size needles.

Not everyone uses a thimble, but I can’t get along without one.
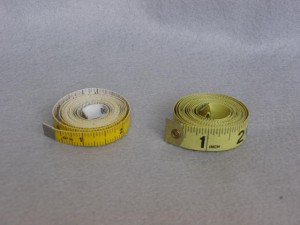
 

Along with my regular width tape measure I have a narrow tape measure made to use for doll making.

I have a few more tools that I use frequently. I have even more gadgets that I enjoy using at times. The six tools that I have named are the ones that I would list if I were playing the what to take to a desert island game for sewing tools.
sewing tips

Stringing Fabric Along

December 12th, 2010

Last week I was sewing several items of doll clothing at one time. First I applied lace to several pieces of knit fabric to make doll underwear. I did not cut the lace between fabric pieces, but sewed a long string of fabric pieces on a length of lace. My husband wandered into my sewing room and commented on my technique. I explained that this was a known technique. I had not invented it. I read about it in a doll making magazine. I also had a friend who used the technique to sew for her daughters. The technique is helpful at this time of year, when there are so many demands on our time.

The method can be used for more things than applying lace. More than one seam or dart can be sewn at one time.The trick is to line up as many items as you have, and do as much sewing as you can without cutting the machine thread. Then cut the fabric string apart and do as much ironing as you can before going on to the next string of sewing.

This string of fabric pieces is on its way to becoming doll panties and camisoles.


getting organized, sewing tips ,

Closing a Garment with Hook and Loop Tape

November 7th, 2010


I like to close garments for small dolls with short pieces of hook and loop tape. In this method the left and right sides of the closing will be side by side like a zipper closing rather than overlapping like closings with buttons or snaps.

Use your favorite method to finish each side of the opening.

Press each finished side of the opening one half inch to the inside.

Take a 1 inch length of three fourths inch wide hook and loop tape. The hook side and the loop side of the tape should be fastened.

Split this tape in half lengthwise so that there are two 1 inch lengths of three eighths inch tape.

Separate the tape into the hook and loop sides.

Take the hook side of one of the tape pairs and lay it face up partly under the right side of the opening at the top of the opening. About one fourth inch of tape should stick out of the opening and about eighth inch of the tape should be under the fabric edge of the opening. The bumpy hook side of the tape should be touching the fabric at this one eighth inch overlap.

At the edge of the right back opening stitch through the fabric and the tape.

Lay a piece of loop tape completely inside the left side of the back opening. The loops should be out and the smooth side of the tape should be against the fabric.

Stitch down the tape through the fabric. At one eighth inch from the bottom of the tape, pivot the needle and stitch a few horizontal stitches. Pivot the needle again and stitch back up the tape.

For garments that need a second strip of hook and loop tape measure one half inch down from the first piece of tape and sew the second tape in the same manner as the first tape.

I like to use snag free Velcro. The snag free variety sticks to itself, so you don’t need to worry about hook and loop sides. To use this type of tape, split a single one inch length of tape in half lengthwise so that you have two narrow one inch lengths. Use one piece in place of the hook side and one piece in place of the loop side in the above instructions.


sewing tips

Marching Bands, Twirlers, and A Sewing Tip

October 17th, 2010


When I started to high school, I took a class in sewing. One of my classmates was an upperclassman who was also a twirler in our marching band. Modern marching bands seem to have color guards instead of twirlers. Our band had four twirlers who marched in front of the band and did interesting things with their twirling batons. The twirlers also got to wear very attractive short costumes instead of the clunky band uniforms that the rest of us had to wear.

The twirler in my sewing class was a very nice person, but I was new to high school and band. I was in awe of her. When she gave the class a sewing tip, I took her seriously. She suggested using a contrasting thread when hand basting a seam, before sewing it on the machine. She thought that the basting thread was easy to remove after the seam had been sewn, because the contrast made it easier to see.

I took her tip as a royal command. I used her basting method for years. Then I realized that sometimes I caught the basting thread with my machine stitches. When this situation occurred, the caught thread was very difficult to remove. If I didn’t spend a lot of time with tweezers removing the thread, it was a visible mistake. The contrasting thread color showed up very well. Sometimes hand basting stitches in the tiny doll clothes don’t need to be removed at all, if the thread color matches. Now I use matching thread when I baste doll clothes. However, if you think the contrasting thread trick is a better method of basting, please use it.


sewing tips

More on Printing on Fabric and a New Free Pattern

October 3rd, 2010


This past week my husband and I finished the globe pin cushion project that was discussed in last week’s blog. We treated a piece of white cotton broadcloth with Bubble Jet Set 2000. This product is a liquid available on line. After the treated fabric had dried, we cut a sheet of freezer paper to the size of printer paper and ironed this sheet to our treated fabric. We trimmed our fabric and printed the globe pattern on it. The homemade fabric sheet worked fairly well, although we found that the printed colors faded more than the colors on the commercial printable sheets that were discussed last week.

Anyone who is interested in making the globe pin cushion can download a copy from this website. Click on the pattern button at the top of the page and then on the pin cushion picture. The instructions are in inches rather than metric measurements. The files are made to be printed on US rather than metric printer paper. I hope that the pattern will be usable for anyone who is interested in it. If you have any questions, please email me or make a comment on the blog.

my patterns, sewing tips ,

Globe Pin Cushions

September 26th, 2010


My husband takes the photographs for my blog and downloads them for me. After he photographed my tomato pin cushion, he started thinking about making a globe pin cushion. This idea lead him into map research. He came up with a globe pattern. I helped with suggestions on darts and seam allowances.

We then did more experiments printing on fabric. We tried several commercial fabric sheets made to go through ink jet printers. Some of the commercial fabric sheets are treated to make the printer ink permanent. We also discovered a simpler way to make our own printable fabric sheets. We discovered a chemical used to make the ink permanent on homemade fabric sheets. We haven’t tried the chemical yet. I will let you know how it works for us. All of the products that we tried were made for the quilting industry. Quilting is a much more popular craft than dollmaking. If I had paid more attention to quilting news, I would have discovered these techniques earlier.

The fabric on this globe had not been pretreated to retain the ink. It was painted with Mod Podge to protect it. The coating gives it a shiny finish. The moon is the correct scale size for the earth, but it should be attached with a seven foot string to be the correct scale distance.

These globes were printed on June Taylor Sew-in Colorfast and Printed Treasures by Dritz. After the fabric was printed, it was rinsed and allowed to dry.  Then I cut out and sewed the globes. Both of these products were made for quilting appliques. They were not designed for the type of sewing required for the pin cushion, but I was able to make a pin cushion from each of them. The June Taylor sheets were stiffer and harder to sew.

sewing tips

Inserting Elastic into a Casing

August 8th, 2010


I used to spend a lot of time fussing with elastic when a pattern had an elastic casing. With the method I use now I am finished with the elastic in no time.

For doll clothes I always use one eighth inch elastic and my favorite bodkin.   

Use the whole length of elastic. Do not cut the elastic until it is secured on both sides of the casing.

If a seam is inside the casing, the two seam edges should have been finished together and pressed to one side. The bodkin should travel over the stitching first and then over the finished seam.


Pull the elastic through the casing with the bodkin. 

Release the elastic from the bodkin and secure the released end to the casing by sewing through it several times. 

Check the pattern instructions for measurement. Gather the casing fabric over the elastic to the desired length without stretching the elastic. 

Try the garment on to check the size.  

Secure the second side of the elastic to the second casing opening by sewing through it and the casing several times.  

Cut off the excess elastic.

sewing tips

Finishing Seams with a Zigzag Stitch

July 25th, 2010


The easiest way to finish raw edges in doll clothes is by using the zigzag stitch on your machine. You do not need to change machines or find your pinking shears to finish the seam. It is also easy to sew small curves with a zigzag stitch.

Finishing two raw edges together

Sew the seam with a straight stitch.

Set the zigzag stitch about one eighth inch wide.

Make the zigzags close together, but not a satin stitch.

Zigzag close to the straight stitch so that there is about an one eighth inch raw edge.

Trim the seam close to the finished edge.

Press the seam to one side.

Finishing single edges in hems and casings

Sew near the edge to be finished.

Turn up the hem the desired amount and slipstitch.

For hems in A line garments add a machine gathering stitch next to the finished edge.

Pull the gathering thread until the hem lies lies flat against the skirt and slipstitch.


sewing tips

Using a Serger to Finish Seams

July 18th, 2010


I sometimes use my serger to finish doll clothes seams. I like the finished look that it gives, but I always stitch the seam first and then serge. I think my serger’s stitch is too wide to use as a construction seam. Small curves on doll clothes such as those on sleeves and necklines are difficult to do with a serger.

Finishing two raw edges together

Sew the seam with a straight stitch on a sewing machine.

Serge using only three spools of thread. This method produces a narrow finished seam.  Serge close to the machine stitching so that the serger knife will trim the seam to about one eighth inch.  Note that the bottom of the sample has not been serged to show how the serger knife has narrowed the seam.

Add a drop of seam sealant on the stitching at the beginning and end of each line of serging.

Press the seam to one side.

Finishing single edges in hems and casings

Use only three thread spools to make a narrow finish.

Serge near the edge so that the fabric is not cut with the knife.

Turn up the hem the desired amount and slipstitch.

For hems in A-line garments add a machine gathering stitch next to the finished edge.

Pull the gathering thread until the hem lies lies flat against the skirt and slipstitch.

sewing tips ,

Pretty Pinking

July 11th, 2010


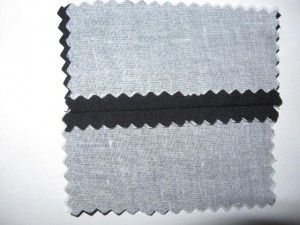
I recently treated myself to a new pair of pinking shears. I have had a hand-me-down pair for many years. When I tried to use the old pair, they were hard to open and close. They tended to mangle the raw edges that I was trying to finish. I always ended up discouraged and finally decided that pinking was an inconvenient way to finish seams. I am amazed at how well my new shears work. I can even use them to finish narrow doll clothes seams. Here are a few tips for pinking doll clothes seams:

  • Pink the seam close to the raw edge. The measurement from the peak of the pinked edge to the stitch should be almost ¼ inch.
  • Small curves are difficult to cut with pinking shears.
  • These seams may be pressed open unless they are inside an elastic casing.
  • The Pinked edges may be pressed in the same direction so that the machine stitching is visible inside the garment. The edges must be pressed in one direction if they will be inside an elastic casing.

New Things, sewing tips